
Why “Rainy Day” Money Matters More Than Ever
We don’t live in a “$500 emergency” world anymore.
According to recent data from the U.S. Federal Reserve, about 37–40% of adults would struggle to cover a $400 unexpected expense without borrowing or selling something. At the same time, surprise costs are getting larger: a minor car repair can easily hit $700–900, and a simple emergency room visit in the U.S. can cross $2,000.
So “saving for a rainy day” isn’t just a nice idea — it’s basic survival in a volatile economy.
But here’s the twist:
you don’t need a finance degree, a high salary, or superhuman discipline. You need a realistic plan, a few smart tools, and some slightly unconventional tactics that work with human behavior instead of against it.
—
How Much Rainy-Day Money Do You Actually Need?
Classic Rule vs. Real Life
You’ve probably heard the rule:
3–6 months of essential expenses.
That’s a good benchmark, but for many people it sounds about as realistic as “buy a second home for passive income.”
A more practical starting ladder:
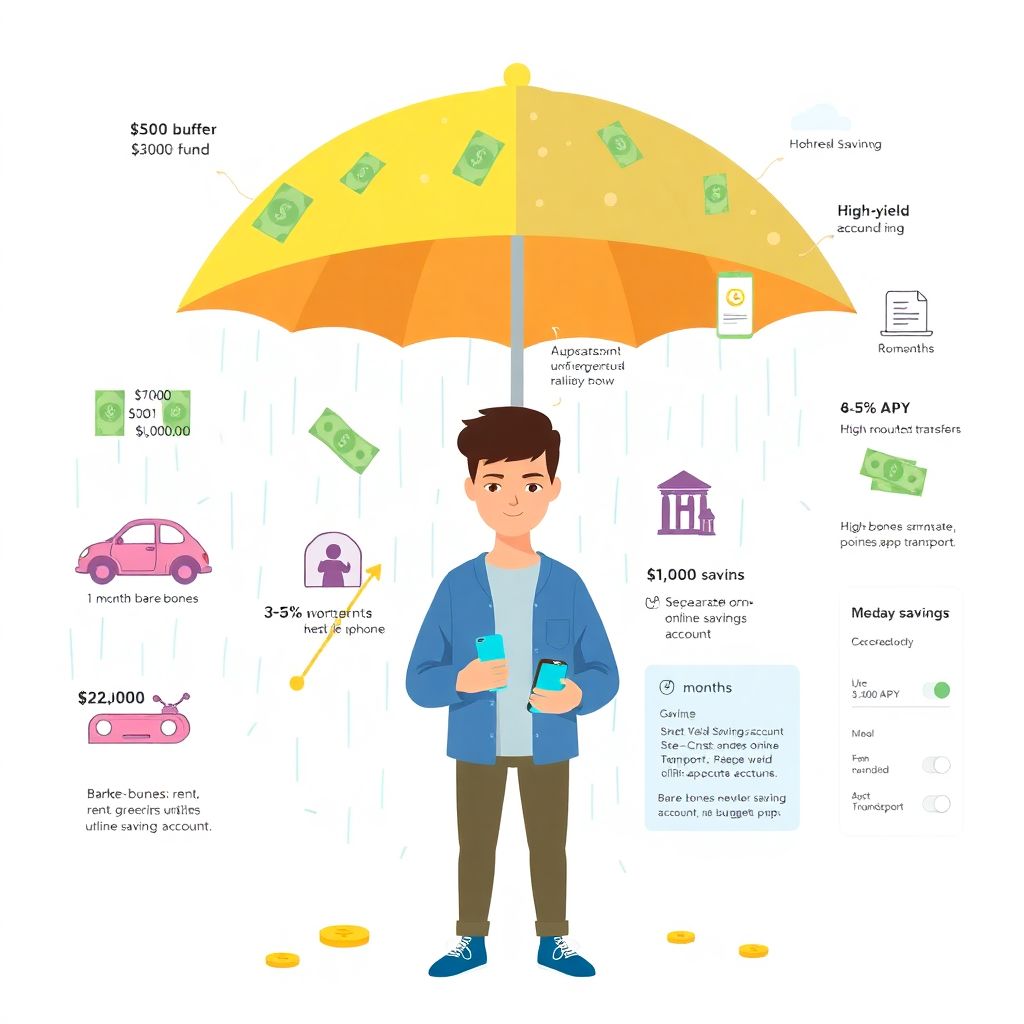
– Step 1: $500 buffer – covers small emergencies (copay, minor repair).
– Step 2: $1,000–$2,000 – shields you from most “annoying but not catastrophic” surprises.
– Step 3: 1 month of bare-bones expenses – rent, groceries, utilities, transport.
– Step 4: 3–6 months – long-term target, especially if your income is unstable.
Focus on the next step only. Thinking about the entire staircase at once just kills motivation.
—
Quick Reality Check: What Are “Bare-Bones” Expenses?
Bare-bones = what you need to stay afloat, not your normal lifestyle.
– Rent / mortgage
– Utilities & basic phone/internet
– Groceries (no expensive extras)
– Transportation to work
– Minimum debt payments
– Essential insurance
If that’s, say, $2,000 a month, then:
– First milestone: $500
– Comfortable cushion: $2,000–$4,000
– Robust safety net: $6,000–$12,000
You’re not behind if you’re not there yet. You’ll get there by making the system do the work.
—
Where to Park Your Rainy-Day Fund (So It Actually Grows)
Why Your Checking Account Is the Worst Place
Keeping your emergency fund in your main checking account almost always ends the same way: it gets spent.
Also, many checking accounts in traditional banks still pay 0.01%–0.05% APY. At that rate, $5,000 earns you maybe a couple of dollars a year. Inflation quietly eats the rest.
You want:
– Safety (FDIC / similar guarantees)
– Easy access (no penalties if you need cash)
– Decent yield (ideally > 4% APY in the current rate environment)
That’s exactly what modern savings products are built for.
—
Using High-Yield and Online Banks to Your Advantage
Most of the top online banks for savings now offer significantly higher interest than brick-and-mortar banks because they don’t pay for branches and local offices. It’s normal today to see 4.0–5.0% APY on a no-fee savings account (exact numbers change, but this is realistic as of the last couple of years).
> Technical block: What a 4.5% APY Actually Means
>
> – Suppose you keep $3,000 in a savings account earning 4.5% APY.
> – After 1 year, ignoring compounding nuances, you’ll earn around $135 in interest.
> – In a typical big-bank savings account at 0.01%, you’d earn $0.30.
> – Over 5 years, the difference can add up to hundreds of dollars, with literally no extra effort.
This is why people search for the best high-yield savings accounts: a single signup decision can permanently raise the “salary” your savings are earning.
—
How to Start an Emergency Fund When Money Already Feels Tight
Step 1: Ignore Your Income (Temporarily) and Study Your Cash Flow
It sounds counterintuitive, but don’t start with “How much can I save?” Start with:
– Where does every dollar go?
– Which expenses are “fixed” vs. “behavioral”?
You don’t need a spreadsheet obsession. Use simple budgeting tools to save money and to see patterns:
– Apps like YNAB, EveryDollar, or even a basic bank budgeting feature
– A simple rule: track every expense for 14 days; patterns emerge faster than you expect
You’re looking for repeatable leaks: subscriptions you forgot, food delivery habits, impulse purchases tied to stress or boredom.
—
Step 2: Create Tiny, Uncomfortable-but-Possible Savings Targets
Instead of saying, “I’ll save $300 a month,” try:
– Week 1–2: $10 a week
– Week 3–4: $20 a week
– Month 2: $25–30 a week
These numbers are small enough to be doable even on a low income, but big enough to move the needle over time.
Real-life example
Maria, a retail worker earning about $2,300/month after tax, started with $15 per week. She cut:
– One food delivery order a week
– One gas station snack run
Within 6 months, without “feeling like she was saving,” she hit about $400. A month later, her car needed a $350 repair. She paid cash, no credit card, no stress spiral. That’s exactly what a rainy-day fund is for.
—
Step 3: Automate Before Your Brain Wakes Up
Humans are bad at consistent willpower. Machines are excellent.
Set up automatic transfers that happen the same day you receive income.
If you get paid on Friday, your emergency fund transfer should be scheduled for Friday morning, not after you’ve gone out for the weekend.
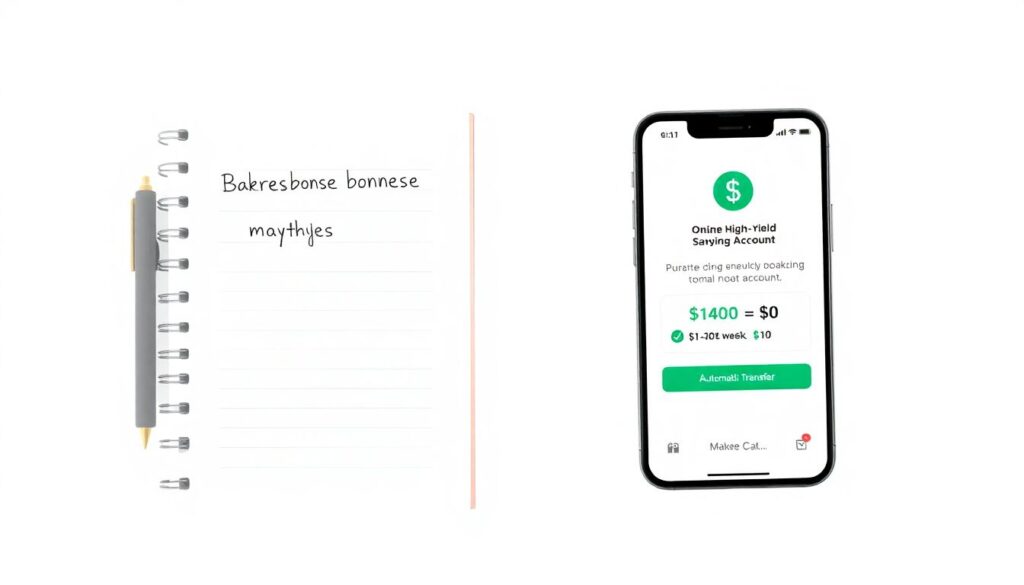
> Technical block: Simple Automation Setup
>
> 1. Open a separate savings account at an online bank.
> 2. Turn on automatic transfers from checking to savings (e.g., $25 every Friday).
> 3. Label the account “Emergency Only” or “Job Loss Fund” so you feel guilty dipping into it.
> 4. If your bank allows, hide the balance from the main screen in your app to reduce temptation.
This works even better with apps that round up purchases or move “spare change” into savings automatically.
—
Unconventional Saving Tactics That Work in Real Life
1. The “Expense Swap” Game
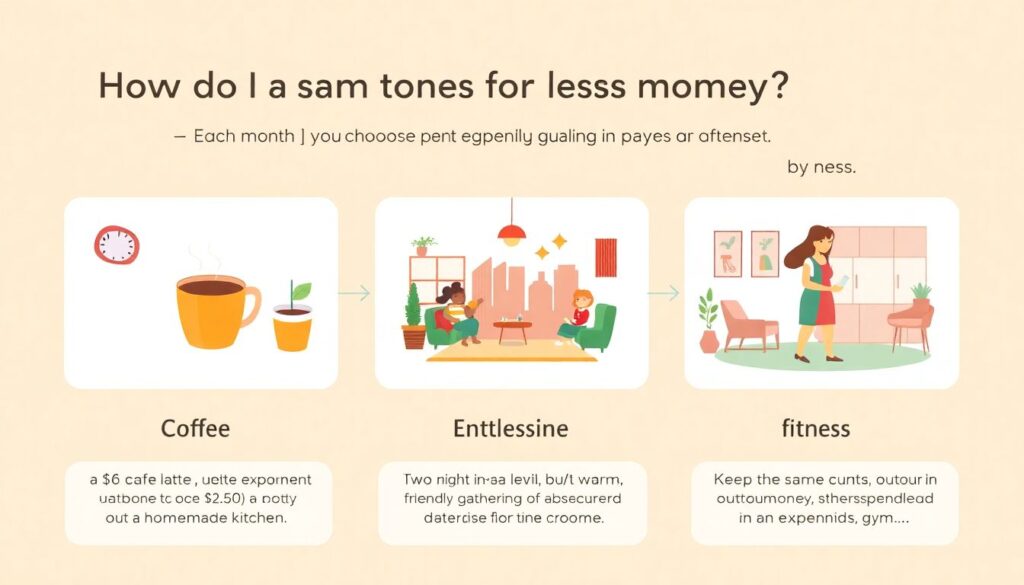
Instead of generic “cut back” advice, pick a single category each month and play a game: “How do I keep the same outcome for less money?”
Examples:
– Keep coffee, switch from $6 café latte to $1.50 homemade latte.
– Keep entertainment, but swap 2 nights out for 2 house gatherings.
– Keep fitness, but move from boutique studio to local gym + free YouTube workouts.
Calculate the difference and move it directly, that same day, into your rainy-day fund.
People are more willing to swap than to sacrifice. Psychologically, it hurts less. Financially, it does the same thing.
—
2. The “Future You” Penalty Jar (Digital Version)
Whenever you blow your budget on something non-urgent (say, impulsive online shopping):
– Set a rule: for every $1 overspent, $0.25–0.50 must go into savings within 24 hours.
You can automate this with certain banks by creating rules or using savings apps that move money every time you make a purchase. It feels like a penalty—but unlike a parking ticket, the money goes to *you*.
—
3. Use Time as a Filter, Not Willpower
Create a 48-hour rule for unplanned purchases over a certain threshold (for example, $50):
– If you see something you want, note it in a list.
– Wait 48 hours.
– If you still want it, and it fits your budget, buy it.
– If not, transfer the equivalent amount to your emergency fund.
A surprising percentage of “must-have” items evaporate after two sleeps. This technique alone can build hundreds of dollars of savings per year without feeling deprived.
—
Making Apps and Tech Do the Heavy Lifting
Automatic Savings Apps: What Actually Matters

There are many apps that promise to save “without you noticing.” When people search for automatic savings apps comparison, they’re usually trying to answer two practical questions:
1. Will this mess with my cash flow and cause overdrafts?
2. Is the automation actually flexible?
Things to look for:
– Can you set strict caps (e.g., “never take more than $20 a week”)?
– Does it offer round-ups, scheduled transfers, or AI-based “safe to save” calculations?
– How easy is it to pause during a tight month?
> Technical block: Round-Ups in Practice
>
> – You buy groceries: $23.40
> – App rounds to $24.00 and moves $0.60 to savings
> – Over ~40–50 transactions/month, that might be $15–25
> – Combine with a fixed $10 weekly transfer, and you’re at $55–65/month with almost no friction
That’s $660–780 a year, which is an entire starter emergency fund for many people.
—
Budgeting Tools That Don’t Require a Personality Change
If you hate budgeting, use lighter-weight budgeting tools to save money that can do most of the work automatically:
– Bank-native “spending insights” that categorize purchases
– Apps that forecast upcoming bills so you don’t overdraft
– Simple “envelope” systems in digital form (e.g., separate sub-accounts: “Bills,” “Groceries,” “Rainy Day”)
The key is to choose a system you’ll actually open once a week, not the most feature-rich app on the market.
—
Choosing the Right Place for Your Fund (Without Overthinking)
When to Move Beyond Basic Savings
Basic high-yield savings accounts are ideal for:
– Car repairs
– Medical surprises
– Temporary loss of income
If your emergency fund grows beyond 6 months of expenses, you might consider:
– Keeping 3–6 months in cash
– Investing the rest for longer-term goals (retirement, house deposit)
Until then, liquidity beats returns. Being able to access your money instantly matters more than earning an extra 0.3% somewhere else.
—
How to Evaluate Banks Without Getting Lost in Fine Print
When scanning offers from the best high-yield savings accounts, focus on:
– APY (but remember it fluctuates with interest rates)
– Fees (monthly maintenance fees are a red flag)
– Minimums (avoid accounts requiring large balances)
– Transfer speed (1–2 business days is standard between banks)
Many of the top online banks for savings also offer:
– No minimum balance
– No monthly account fees
– Mobile check deposit
– 24/7 customer support via chat or phone
If changing banks feels overwhelming, open the new savings account only for your emergency fund and keep your old checking where it is. You can slowly migrate later if it makes sense.
—
Layering Your Rainy-Day Strategy: A Realistic Blueprint
Build It in Stages, Not All at Once
Think of your rainy-day savings as building layers of protection:
1. Micro-buffer:
– Target: $100–$300
– Tactics: round-ups, selling unused items, cash-back redirected to savings
2. Base emergency fund:
– Target: $500–$2,000
– Tactics: fixed weekly transfers, expense swaps, penalty jar
3. Stability fund (job loss, big life events):
– Target: 1–3 months of bare-bones expenses
– Tactics: side income, annual windfalls (bonuses, tax refunds) dedicated to savings
4. Full resilience fund:
– Target: 3–6 months
– Tactics: periodic “lifestyle audits,” raising income, optimizing bills (insurance, subscriptions, utilities)
—
Non-Obvious Ways to Supercharge the Fund
Here are some less common — but surprisingly effective — moves:
– Annual bill renegotiation day
Once a year, spend 2–3 hours calling internet, phone, and insurance providers. Any savings you negotiate that day go straight into the emergency account. Many people find $200–600/year this way.
– Use raises and promotions strategically
When your income jumps, lock in a rule:
“50% of any raise automatically increases my monthly savings transfer.”
You still feel richer, but your rainy-day fund grows much faster.
– Seasonal saving sprints
Pick 2–3 months a year where you deliberately go frugal (e.g., “no online shopping February,” “cheap summer”). Use these windows to push your fund up a tier.
—
Staying Motivated When the Goal Feels Far Away
Reframe: It’s Not Just Money, It’s Reduced Anxiety
Rainy-day savings are not about becoming rich. They are about:
– Sleeping better because you know one bad week won’t destroy you
– Arguing less about money at home
– Having the option to say “no” to toxic jobs or landlords
If you track only the dollar amount, progress feels slow. If you track emotional impact — fewer panic moments, less dread when your phone buzzes with “Payment due” — you’ll notice gains long before hitting the classic “3–6 months” target.
—
Use Milestones, Not Perfectionism
Instead of obsessing over a “perfect” number:
– Celebrate hitting $100, $250, $500, $1,000.
– Every time you reach a new level, mark it somehow: a note on the fridge, a screenshot saved in a folder, a quick journal entry.
Missing a transfer or dipping into the fund isn’t failure. It’s proof the system is working — the money was there when you needed it. Just refill and continue.
—
Practical Action Plan for the Next 30 Days
To turn this from theory into cash in an account, use this simple four-week roadmap.
Week 1: Set the Stage
– Calculate bare-bones monthly expenses (rough estimate is fine).
– Open a separate high-yield savings account online.
– Turn on a small automatic transfer (e.g., $10–20/week).
Week 2: Plug the Biggest Leak
– Track every single expense for 7 days.
– Pick the one category that surprised or annoyed you most.
– Design an “expense swap” to free up $10–30/week and bump your automatic transfer accordingly.
Week 3: Automate the “Little Stuff”
– Turn on card round-ups if your bank/app offers it.
– Create a 48-hour rule for anything over your chosen threshold (say, $40–50).
– Send at least one “would-have-bought” item’s value to your rainy-day fund.
Week 4: Lock It In
– Review progress: how much did you save this month?
– Adjust your weekly transfer to a number that felt slightly uncomfortable, but doable.
– Rename your savings account something meaningful (“I Don’t Panic Anymore Fund,” for example).
Repeat. Improve. But above all, keep it automatic.
Your rainy day will show up at some point — everyone’s does. The question isn’t *if*; it’s *whether you’ve quietly built an umbrella in the background* while you went about your life.